1 在你想要加轮播图的位置加入以下1 2 3
1.在你想要加轮播图的位置加入以下
1 <div id="flowDiagram" > 2 <div id="button"> 3 <span index="1" class="on"></span> 4 <span index="2"></span> 5 <span index="3"></span> 6 <span index="4"></span> 7 <span index="5"></span> 8 </div> 9 <div id="photo" style="left:-1200px;"> 10 <div> 11 {pc:content action="position" posid="1" thumb="1" order="listorder DESC" num="5"} 12 {loop $data $r} 13 <div ><a href="{$r[url]}" target="_blank" title="{$r[title]}"><img src="{thumb($r[thumb],1200,320)}" style="width:1200px; height:320px;" alt="{$r[title]}" /></a></div> 14 {/loop} 15 {/pc} 16 <ul> 17 {pc:content action="lists" catid="" thumb="1" order="listorder DESC" num="5"} 18 {loop $data $r} 19 <li><a href="{$r[url]}" target="_blank" title="{$r[title]}">{str_cut($r[title],20)}</a></li> 20 {/loop} 21 {/pc} 22 </ul> 23 <div></div> 24 </div> 25 </div> 26 <span id="pre" class="arrow"> <</span> 27 <span id="next" class="arrow">> </span> 28 </div>
由于这个焦点幻灯比较特殊,图片和文字需要两次调用,另外,后台添加内容时要勾选首页焦点图推荐,就可以添加到首页
2.当然,这里面的css样式根据自己的需求做更改,在这里就不贴出css代码了,实现轮播需要加入以下js代码
 1 window.onload=function(){//获取元素
 2     var flowDiagram = document.getElementById('flowDiagram');//容器
 3     var photo = document.getElementById("photo");
 4     var button = document.getElementById("button").getElementsByTagName('span');
 5     var pre = document.getElementById("pre");
 6     var next = document.getElementById("next");
 7     var index = 1;
 8     var m;
 9
10     function move(){
11         m = setInterval(next.onclick,3000);
12     }
13     function stop(){
14         if(m)clearInterval(m);
15     }
16     function buttonlight(){
17         for (var i = 0; i < button.length; i++) {
18             if(button[i].className == "on"){
19                 button[i].className = "";
20                 break;
21             }
22         }
23         button[index-1].className = "on";
24     }
25
26     pre.onclick=function() {
27         if (index == 1)
28             index = 5;
29         else
30               index = index - 1;
31         buttonlight();
32         photo.style.left = parseInt(photo.style.left) + 1200 + "px";
33         if (parseInt(photo.style.left) > -1200){
34             photo.style.left = -6000 + "px";
35        }
36     }
37
38     next.onclick = function(){//当right键被触发时响应
39         if (index == 5)
40             index = 1;
41         else
42             index = index + 1;
43         buttonlight();
44         photo.style.left = parseInt(photo.style.left) - 1200 + "px";
45         if (parseInt(photo.style.left) < -6000){
46             photo.style.left = -1200 + "px";
47         }
48     }
49
50     for (var i = 0; i < button.length; i++){
51         button[i].onclick = function()
52         {
53             if(this.className=="on")
54                 return;
55             var currentindex = parseInt(this.getAttribute("index"));//getAttribute能获取自定义的属性值,也可以获取自带的属性值
56             var distance = currentindex - index;
57             photo.style.left = parseInt(photo.style.left) - 1200 * distance + "px";
58             index = currentindex;
59             buttonlight();
60         }
61     }
62     flowDiagram.onmouseover = stop;
63     flowDiagram.onmouseout = move;
64     move();
65 }
最终效果
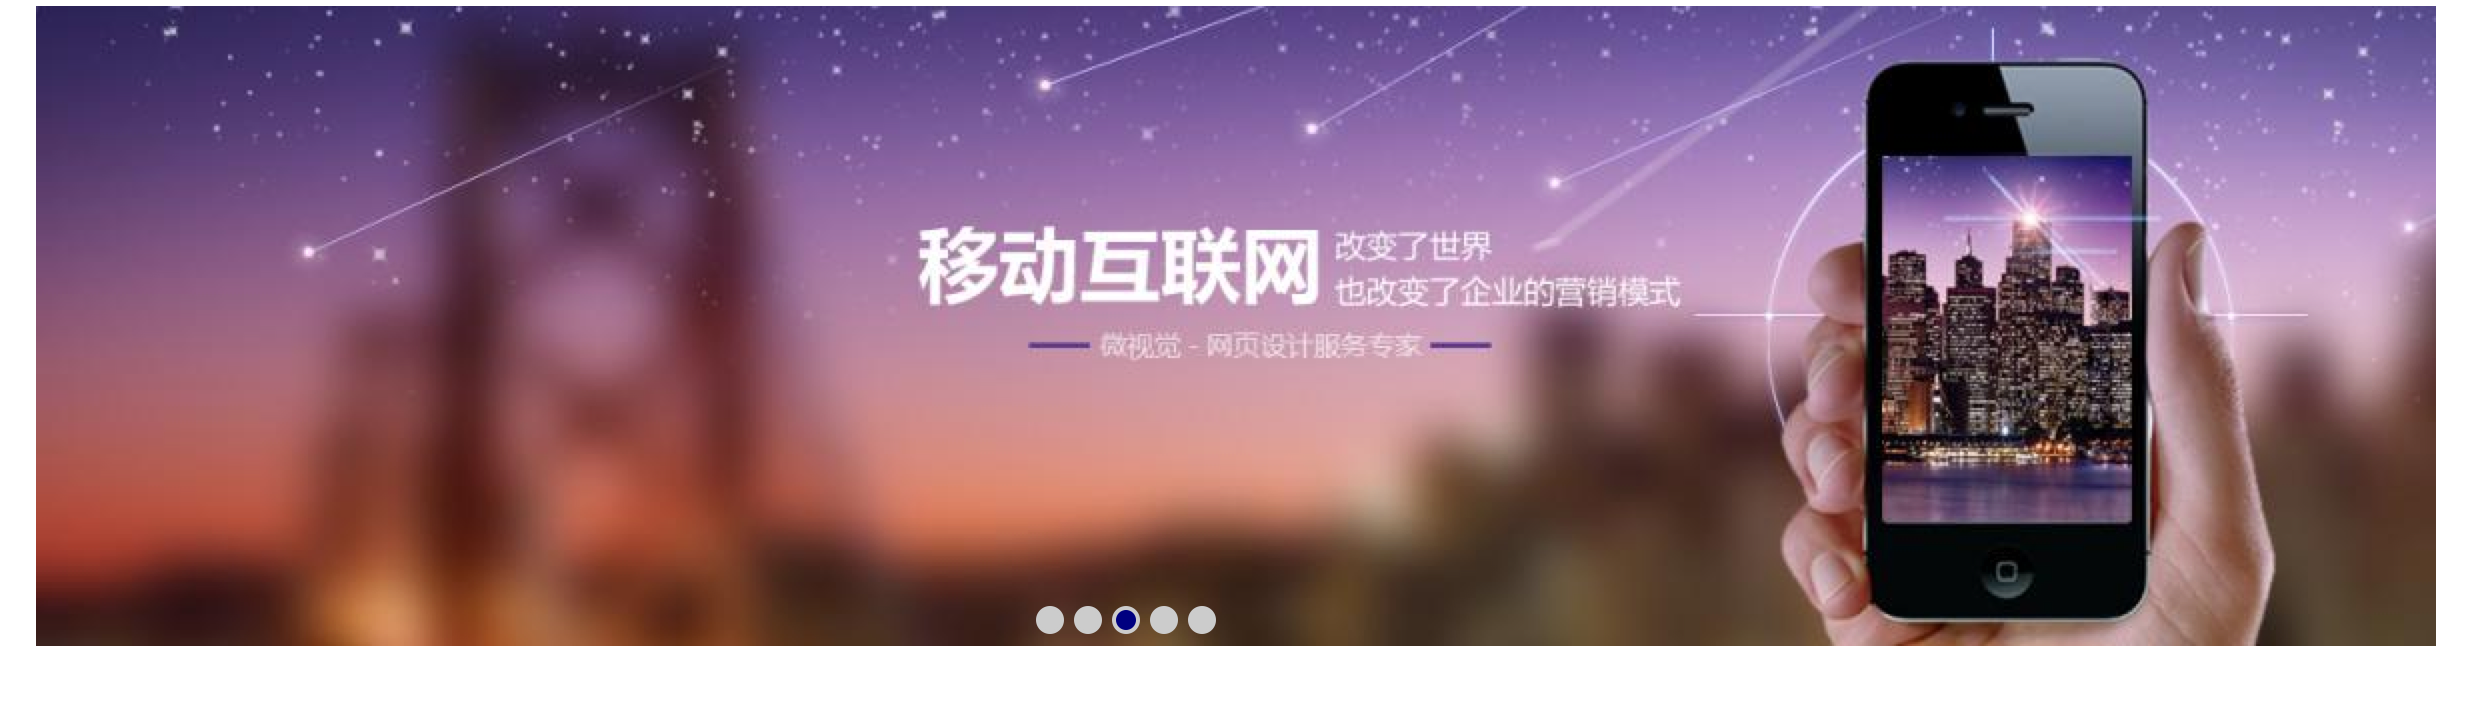
地址 http://sshpark.com.cn/