前言
项目为了模块化,创建了一堆Package和Plugin,这么做没什么问题,但是遇到Flutter SDK目录路径变化或者其他一些情况导致需要重新获取依赖项时就麻烦了。麻烦之处在于需要在每个pubspec.yaml文件所在的目录中运行flutter pub get命令,虽然也不是什么大问题,但是这种重复简单的操作实在不想做。
开发环境
- Flutter: 3.10.2
- Dart: 3.0.2
Flutter内置命令
如果你研究过Flutter SDK(Flutter框架项目),那么你对flutter update-packages命令一定不陌生,执行这个命令可以获取Flutter框架项目所需要的全部依赖项,避免一个个去执行flutter pub get命令。可惜这个命令只能用于Flutter框架项目,不过我们可以先看看Flutter是怎么做的,然后自己实现一个。
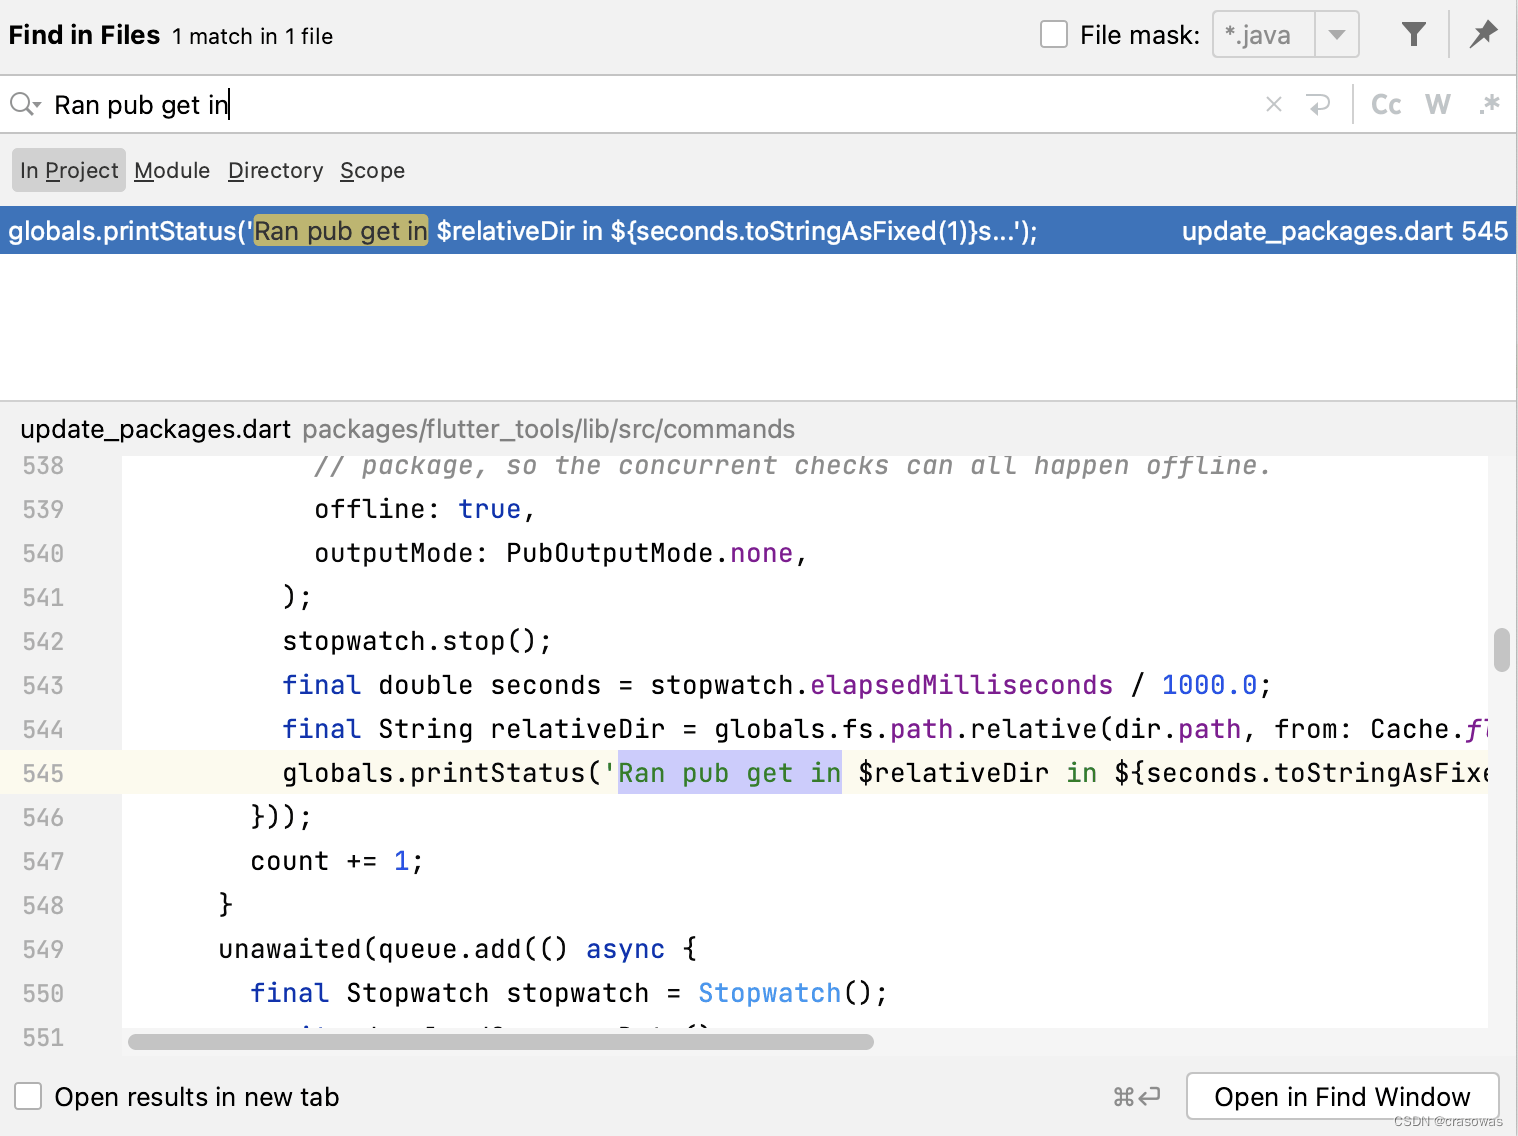
根据flutter update-packages命令执行时的输出日志Ran pub get in ...,可以快速定位到update_packages.dart文件(位于Flutter框架项目/packages/flutter_tools/lib/src/commands目录)中的_runPubGetOnPackages方法:

Future<void> _runPubGetOnPackages(List<Directory> packages) async {
  ...
  try {
    ...
    for (final Directory dir in packages) {
      unawaited(queue.add(() async {
        final Stopwatch stopwatch = Stopwatch();
        stopwatch.start();
        await pub.get(
          context: PubContext.updatePackages,
          project: FlutterProject.fromDirectory(dir),
          // All dependencies should already have been downloaded by the fake
          // package, so the concurrent checks can all happen offline.
          offline: true,
          outputMode: PubOutputMode.none,
        );
        stopwatch.stop();
        final double seconds = stopwatch.elapsedMilliseconds / 1000.0;
        final String relativeDir = globals.fs.path.relative(dir.path, from: Cache.flutterRoot);
        globals.printStatus('Ran pub get in $relativeDir in ${seconds.toStringAsFixed(1)}s...');
      }));
      count += 1;
    }
    ...
  } catch (exception) { // ignore: avoid_catches_without_on_clauses
    status.cancel();
    rethrow;
  }
  ...
}pub.get方法的作用就是执行pub get命令。通过这个方法大概也清楚了,其实Flutter是通过遍历全部项目路径,然后一个个执行pub get命令的方式获取的依赖项。那项目路径列表是怎么获得的呢?
根据_runPubGetOnPackages方法的调用,找到packages初始化的位置:
@override
Future<FlutterCommandResult> runCommand() async {
  final List<Directory> packages = runner!.getRepoPackages();
  ...
  await _runPubGetOnPackages(packages);
  return FlutterCommandResult.success();
}继续找下去会发现,Flutter其实也是通过递归找到项目路径(包含pubspec.yaml文件的目录路径):
static List<String> _gatherProjectPaths(String rootPath) {
  if (globals.fs.isFileSync(globals.fs.path.join(rootPath, '.dartignore'))) {
    return <String>[];
  }
  final List<String> projectPaths = globals.fs.directory(rootPath)
    .listSync(followLinks: false)
    .expand((FileSystemEntity entity) {
      if (entity is Directory && !globals.fs.path.split(entity.path).contains('.dart_tool')) {
        return _gatherProjectPaths(entity.path);
      }
      return <String>[];
    })
    .toList();
  if (globals.fs.isFileSync(globals.fs.path.join(rootPath, 'pubspec.yaml'))) {
    projectPaths.add(rootPath);
  }
  return projectPaths;
}
这么一分析,好像Flutter用的方法也蛮简单的,大家一般也都能想的到。
一行命令实现
1. 命令使用
按照这个思路,我首先想到可以写一个shell脚本,递归遍历出全部的项目路径,然后再挨个执行flutter pub get命令,结果写着写着发现完全用不到shell脚本,一行命令就可以解决了。
完整命令如下:
find [path] -name "pubspec.yaml" -exec dirname {} \; | xargs -I {} flutter pub get -C {}注意,使用时请将命令中的[path]替换为你的Flutter项目路径。如果命令就在Flutter项目路径下执行,那么可以直接使用以下命令(.表示当前路径):
find . -name "pubspec.yaml" -exec dirname {} \; | xargs -I {} flutter pub get -C {}2. 命令解释
命令主要分前后两部分,用管道符|分割,前半部分用于查找所有的项目路径,后半部分用于获取全部的依赖项。
- find [path] -name "pubspec.yaml":在指定的路径中递归查找所有名称为pubspec.yaml的文件
- -exec dirname {} \;:对于找到的每个文件,执行dirname命令获取目录路径
- |:管道符,将前一个命令的输出传递给下一个命令
- xargs -I {} flutter pub get -C {}:xargs 命令的作用是将管道传递的输入转换为命令行参数,-I 选项用于指定替换字符串 {}。简单来说,每一个项目路径都会转化为flutter pub get -C 项目路径命令执行
可以通过执行man find和man xargs命令获取更多关于find和xargs命令的使用方法。
3. 命令扩展
前面的命令用于获取全部依赖项,稍微修改后同样也可以用于升级全部依赖项:
find [path] -name "pubspec.yaml" -exec dirname {} \; | xargs -I {} flutter pub upgrade -C {}最后
到此这篇关于Flutter如何通过一行命令解决多个pubspec.yaml文件的依赖项问题的文章就介绍到这了,更多相关Flutter pubspec.yaml文件的依赖项内容请搜索好代码网以前的文章或继续浏览下面的相关文章希望大家以后多多支持好代码网!

