春风如梦风过无痕,只为心的思念,遥寄一份浓浓的祝福。决不能习惯失败,因为你要知道,身体的疲惫,不是真正的疲惫;精神上的疲惫,才是真的劳累。
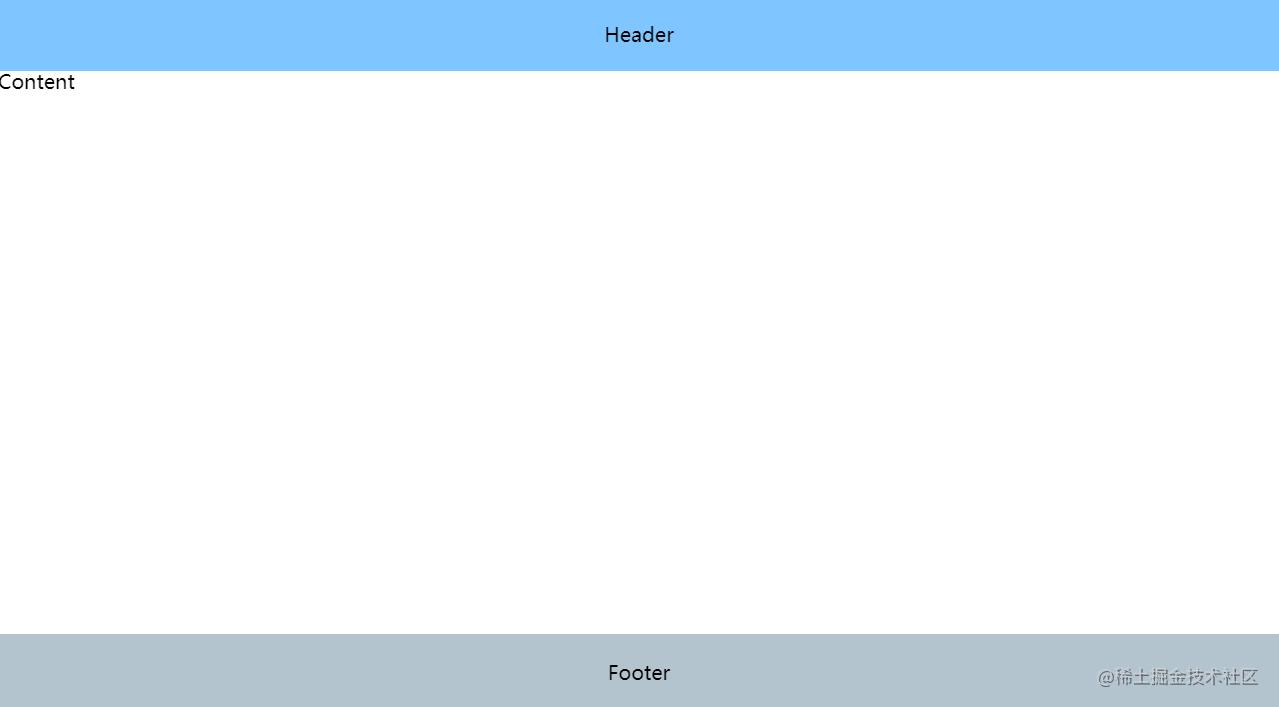
前几天被人问,「如何把元素固定在容器底部」。(本来想直接把 demo 地址给他,结果没找到,那么今天我们来补一下)
Demo 地址
想法&思路
如果是页面底部,我们可以直接position: fixed;bottom: 0;基于浏览器定位直接实现。
但是他要的效果是基于父级容器,那么我们必须要使用其他手段来定位了
relative来限制absolute,然后bottom: 0,但是在内容过长的时候会导致显示异常。所以我们需要做内部滚动。- 如果做内部滚动,那么我们只要可以撑开盒子即可。不需要绝对定位了
使用 flex 实现
- 父级使用 flex 布局,column 垂直排列。
- 父级定高(height、maxHeight),
.content子级flex:auto;自动撑开。 或者.content做高度限制。 -
footer 可以使用 absolute 加 padding 。或者完全依赖文档流布局都可以
.demo1{
      position: relative;
      padding-bottom: 40px;
      display: inline-flex;
      flex-direction: column;
  }
  .demo1 .footer{
      position: absolute;
      bottom: 0;
      left: 0;right: 0;
      margin: 0;
  }
  .demo1 .content{
      overflow: auto;
  }
calc 实现
如果不使用 flex ,那么我们可以用 calc 来减去 header 和 footer 空间。
<style>
    .demo3{
        position: relative;
    }
    .demo3 .content{
        overflow: auto;
        max-height: calc(100% - 40px);
    }
</style>
absolute 实现
如果 calc 兼容性不太好,那么还可以使用 absolute 将所有元素都脱离文档流。
<style>
    .demo4{
        position: relative;
    }
    .demo4 .header,.demo4 .footer{
        position: absolute;
        margin: 0;
        top:0;left:0 ;right:0;
    }
    .demo4 .footer{
        top: auto;
        bottom: 0;
    }
    .demo4 .content{
        overflow: auto;
        height: 100%;
        padding-top: 30px;
        padding-bottom: 30px;
        margin: 0;
        box-sizing: border-box;
    }
</style>
到此这篇关于css如何把元素固定在容器底部的四种方式的文章就介绍到这了,更多相关css元素固定底部内容请搜索以前的文章或继续浏览下面的相关文章,希望大家以后多多支持!


