目前几乎所有主流的浏览器都支持position属性("inherit"除外,"inherit"不支持所有包括IE8和之前版本IE浏览器,IE9、IE10还没测试过),以下是w3school对position五个值的解释:
其中absolute和relative是最常用的,fixed用得也比较多(其中IE6并不支持fixed)。
1、absolute(绝对定位)
absolute是生成觉对定位的元素,脱离了文本流(即在文档中已经不占据位置),参照浏览器的左上角通过top,right,bottom,left(简称TRBL) 定位。可以选取具有定位的父级对象(下文将说到relative与absolute的结合使用)或者body坐标原点进行定位,也可以通过z-index进行层次分级。absolute在没有设定TRBL值时是根据父级对象的坐标作为始点的,当设定TRBL值后则根据浏览器的左上角作为原始点。具体案例如下:
<!DOCTYPE html PUBLIC "-//W3C//DTD XHTML 1.0 Transitional//EN" "http://www.w3.org/TR/xhtml1/DTD/xhtml1-transitional.dtd">
<html xmlns="http://www.w3.org/1999/xhtml">
<head>
<meta http-equiv="Content-Type" content="text/html; charset=utf-8" />
<title>position:absolute定位</title>
<style type="text/css">
html,body,div{
margin:0;
padding:0;
list-style:none;
}
.center{
margin:30px;
border:#999999 solid 10px;
width:400px;
height:300px;
}
.div1{
width:200px;
height:200px;
background:#0099FF;
/*设定TRBL*/
position:absolute;
left:0px;
top:0px;
}
.div2{
width:400px;
height:300px;
font-size:30px;
font-weight:bold;
color:#fff;
background:#FF0000;
}
</style>
</head>
<body>
<div class="center">
<div class="div1"></div>
<div class="div2">position:absolute定位测试</div>
</div>
</body>
</html>
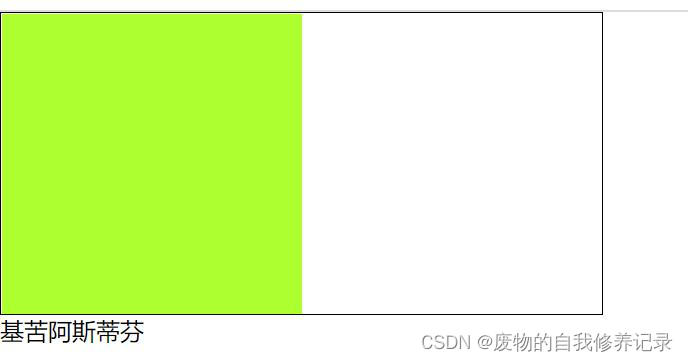
这段代码产生的效果如下:
这是设定TRBL之后的效果(设置TRBL以浏览器左上角为原点),当没有设置TRBL时(没有设置TRBL是以父级对象的坐标为原点),即将div1改成如下代码时
.div1{
width:200px;
height:200px;
background:#0099FF;
/*没有设定TRBL*/
position:absolute;
}
则效果如下:
2、relative(相对定位)
relative是相对的意思,顾名思义就是相对于元素本身在文档中应该出现的位置来移动这个元素,可以通过TRBL来移动元素的位置,实际上该元素依然占据文档中原有的位置,只是视觉上相对原来的位置有移动。具体案例如下:
<!DOCTYPE html PUBLIC "-//W3C//DTD XHTML 1.0 Transitional//EN" "http://www.w3.org/TR/xhtml1/DTD/xhtml1-transitional.dtd">
<html xmlns="http://www.w3.org/1999/xhtml">
<head>
<meta http-equiv="Content-Type" content="text/html; charset=utf-8" />
<title>position:relative定位</title>
<style type="text/css">
html,body,div{
margin:0;
padding:0;
list-style:none;
}
.center{
margin:30px;
border:#999999 solid 10px;
width:400px;
height:300px;
background:#FFFF00;
}
.div1{
width:200px;
height:150px;
background:#0099FF;
position:relative;
top:-20px;
left:0px;
}
.div2{
width:400px;
height:150px;
font-size:30px;
font-weight:bold;
color:#fff;
background:#FF0000;
}
</style>
</head>
<body>
<div class="center">
<div class="div1"></div>
<div class="div2">position:relative定位测试</div>
</div>
</body>
</html>
代码产生的效果如下:
3、relative与absolute的结合使用
在网页设计时经常会用到浮动来对页面进行布局,但是浮动所带来的不确定因素却很多(例如:IE浏览器的兼容问题)。相对来说,在有些布局中定位使用会更加简单、快捷、兼容性更好(relative与absolute相结合来使用),下面通过网页中的一个实例(网页中的head部分)进行说明,具体代码如下:
<!DOCTYPE html PUBLIC "-//W3C//DTD XHTML 1.0 Transitional//EN" "http://www.w3.org/TR/xhtml1/DTD/xhtml1-transitional.dtd">
<html xmlns="http://www.w3.org/1999/xhtml">
<head>
<meta http-equiv="Content-Type" content="text/html; charset=utf-8" />
<style type="text/css">
html,body,div,ul,li,a{
margin:0;
padding:0;
list-style:none;
}
a, a:hover{
color:#000;
border:0;
text-decoration:none;
}
#warp,#head,#main,#foot
{
width: 962px;
}
/*设置居中*/
#warp{
margin: 0 auto;
}
#head{
height:132px;
position:relative;
}
.logo{
position:absolute;
top:17px;
}
.head_pic{
position:absolute;
top:17px;
left:420px;
}
.sc{
position:absolute;
right:5px;
top:12px;
}
.sc a{
padding-left:20px;
color:#666;
}
.nav{
width:960px;
height:42px;
line-height:42px;
position:absolute;
bottom:0px;
background:url(img/nav_bj.jpg) no-repeat center;
}
.nav ul{
float:left;
padding:0 10px;
}
.nav li{
float:left;
background:url(img/li_bj.jpg) no-repeat right center;
padding-right:40px;
padding-left:20px;
text-align:center;
display:inline;
}
.nav li a{
font-size:14px;
font-family:Microsoft YaHei !important;
white-space:nowrap;
}
.nav li a:hover{
color:#FBECB7;
}
</style>
<title></title>
</head>
<body>
<div id="warp">
<div id="head">
<div class="logo"><img src="img/logo.jpg" /></div>
<div class="head_pic"><img src="img/head_pic.jpg" /></div>
<div class="sc">
<a rel="nofollow noopener noreferrer" href=""><img src="img/sc_btn.jpg" /></a>
<a rel="nofollow noopener noreferrer" href=""><img src="img/sy_btn.jpg" /></a>
<a rel="nofollow noopener noreferrer" href=""><img src="img/kf_btn.jpg" /></a>
</div>
<div class="nav">
<ul>
<li><a rel="nofollow noopener noreferrer" href="">首页</a></li>
<li><a rel="nofollow noopener noreferrer" href="">关于我们</a></li>
<li><a rel="nofollow noopener noreferrer" href="">团队文化</a></li>
<li><a rel="nofollow noopener noreferrer" href="">公司动态</a></li>
<li><a rel="nofollow noopener noreferrer" href="">资讯参考</a></li>
<li><a rel="nofollow noopener noreferrer" href="">业务中心</a></li>
<li><a rel="nofollow noopener noreferrer" href="">合作银行</a></li>
<li><a rel="nofollow noopener noreferrer" href="">联系我们</a></li>
</ul>
</div>
</div>
<div id="main"></div>
<div id="foot"></div>
</div>
</body>
</html>
效果如下图:
在上述代码中首先是给head设置relative定位,那么可以看到里面所有的子元素在设置absolute后都会相对head进行定位,而不是相对body定位。这样相对于用浮动来说就简单方便了很多,也不需要担心兼容问题。
到此这篇关于CSS position属性的正确解释和实例应用就介绍到这了。不管你活成了什么样子,背地里都会有人对你说三道四。更多相关CSS position属性的正确解释和实例应用内容请查看相关栏目,小编编辑不易,再次感谢大家的支持!


